


Wouldn't it be fantastic to have a similar site/blog button that people could come and grab? Not only is it convenient for visitors to follow, but it is also a good way to spread your link over the Web. It is doubtful anyone might be interested in a plain text link of your site, but when coupled with an attractive eye-catching logo/graphics, your link is sure to grab attention.
In today's section, we will show you how to prepare a blog button code up for grabs. This will assume that you already have a ready logo/button to work with.
Step 1: Host Your Image
1. To start with making our very own blog button, first we need to host our button image somewhere. For this, a very easy and free option is Photobucket.com. Go to the Photobucket home page and make a free account. If you use some other image hosting website, you can use that too. For beginners who know little about image hosting, Photobucket offers a very simple and free solution. This tutorial will use Photobucket in its steps.
2. Once you sign in into your Photobucket account, your Home screen will look a little something like the above image. Your last uploaded image will be visible as cover photo of your Photobucket album.
3. On the Home screen, locate the 'Upload' button. Click this button and the following screen will open.
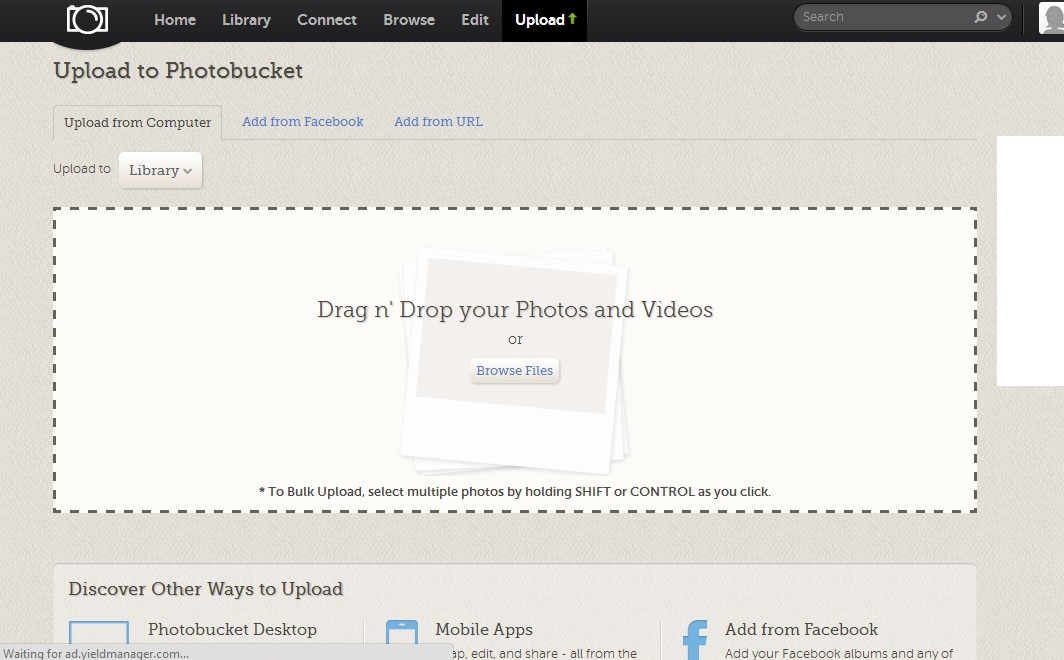
4. Using the 'Browse Files' button to locate your blog button image on your local hard drive and upload it to Photobucket.
Step 2: Getting Your Image URL
1. After successful upload, you will see a thumbnail view of the image you just uploaded.
2. Click on this thumbnail to open this file in full mode. The following screen shot shows this blog button image opened in full mode.

3. When this image is opened in full mode, you will see a number of different options on the right hand side. We are concerned only with the section 'Image Links' for now. Image Links section gives a number of different options like Email & IM, Direct Link, HTML Code and IMG Code.
4. Take your mouse cursor over the Direct Link text box and click once. This will copy this link to your clipboard and a message confirmation of successful copy will be displayed as well. You can paste this link in any other file for now in order to retain it.
Step 3: Preparing Grab Code For Your Viewers
In this step we will prepare an HTML code that will enable your viewers to have your button/badge on their site. This is the same code that you have seen on other people's site; you can copy it and after pasting it into your site code, their button/badge displays on your site too. Now it is time to make one for your own too, and it's very simple!1. Prepare the following HMTL code for your blog button:
<br/><center>Just copy the code below and paste in your site code!</center><br/>
<form>
<center>
<textarea rows="3"><center>
<a href="your blog URL comes here" target="_blank">
<img alt="your blog name comes here" src="blog button image URL comes here">
</a>
</center>
</textarea>
</center>
</form>
2. In place of "blog button image URL comes here",i.e., for value of src, insert the URL that you have copied from 'Direct Link' in Step 2.
3. The value in alt is the text which will appear in tool tip, i.e., if you want a certain text to appear when a user hovers mouse over your button, you can enter that text here.
Step 4: Installing Your Blog Button For Grabs
To install your blog button, go to your Blogger Dashboard > Layout. Click on Add a Gadget > HTML/Javascript.Add the following code to add a preview of your blog button for your users.
<a href="your blog URL comes here" imageanchor="1" style="margin-left: 1em; margin-right: 1em;"><img border="0" src="blog button image URL comes here" /></a>
This will insert your blog button preview for your users. (See below)
Now add the code discussed in Step 3 just below this image code. Your code should look like this:
<a href="your blog URL comes here" imageanchor="1" style="margin-left: 1em; margin-right: 1em;"><img border="0" src="blog button image URL comes here" /></a><br/><center>Just copy the code below and paste in your site code!</center><br/><form><center><textarea rows="3"><center><a href="your blog URL comes here" target="_blank"><img alt="your blog name comes here" src="blog button image URL comes here"></a></center></textarea> </center></form>
See the following screen shot of how this will look in Blogger:


Doesn't it look neat? These are really four very simple steps. Take care in entering blog link and image links as it is easy to get them confused. Try out blog buttons for your site and don't forget to share with us what you come up with!
Till next time :)
Hi, comments are important feedback for us. Please let us know what you think about the article you just read and if it was useful to you in any way. Needless to say, please feel free to leave a message if you feel some area needs correction or update. Thank you for your time.


